Create an online or in-person event, publish it so members can RSVP, and cancel or move it if plans change.
Before you start
- Only Community Admins can manage events.
- Events are free. Every member can RSVP. You can't sell an event or put it in a plan or product.
- There is no capacity, RSVP limit, price or time zone field.
Steps
-
In Studio, go to Events and click Create event.
-
Under Basics, fill in Event title (3 to 60 characters).
-
Optional: fill in Description (plain text, 10 to 750 characters) and add a Cover image.
-
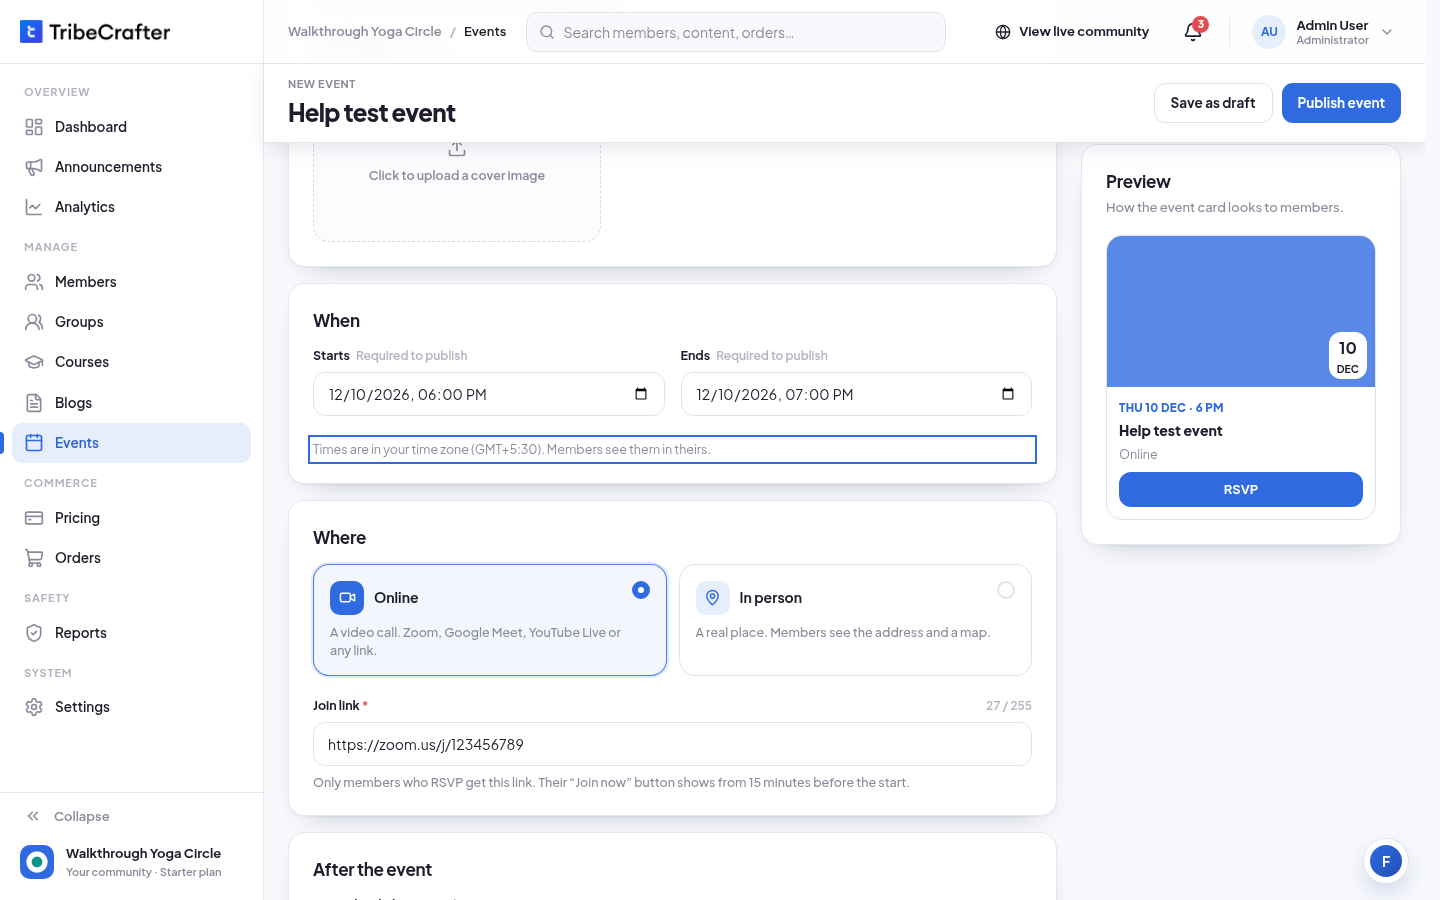
Under When, pick Starts and Ends (date and time). When you pick the start, the end is set one hour later.
-
Under Where, pick Online or In person.
- Online: paste the Join link (Zoom, Google Meet, YouTube Live or any link). Only members who RSVP get it. Their Join now button shows from 15 minutes before the start.
- In person: fill in Address (up to 100 characters). Optional: search the map under Map pin to drop a pin, so members get directions.
-
Optional: under Where members find it, turn on Recommended to show a "Featured" badge and put the event first on the Events page. Show in Google search is on by default. For an in-person event, the address shows on Google too.
-
Click Publish event. A message says the event "is published. Members can RSVP now."
To finish later, click Save as draft. A draft needs only a title.
The first publish puts a post about the event in the community feed, once.
Times and time zones
You enter times in your browser's time zone. The form shows it, for example "Times are in your time zone (GMT+5:30). Members see them in theirs." Each member sees the time in their own time zone. If you plan an event for a city in another time zone, convert the time first.
After the event
Add a recording or photos so members can find them on the event page after it ends.
- Open the event. On Overview, find the Recording panel.
- Paste the link and click Save link. You see "Recording link saved. Members see it after the event."
You can also add it in the form, under After the event (Recording link for online, Photos or video link for in person).
See who is going
Open the event and click the Going tab. It shows each member and the date they RSVPed. You can remove someone with the trash icon before the event. They lose the join link and are not told. They can RSVP again.
Cancel an event
-
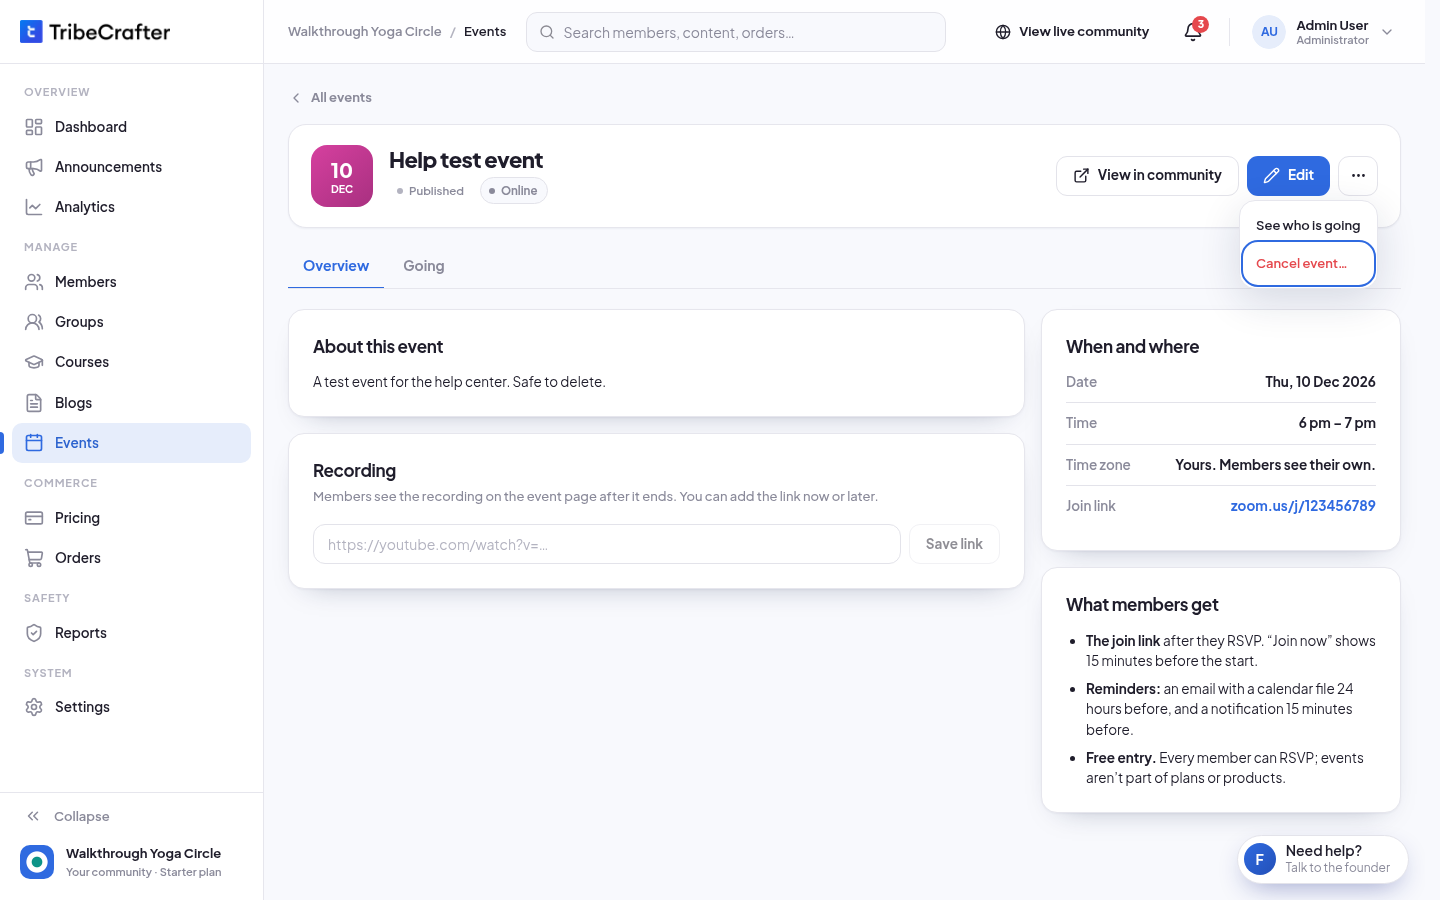
Open the event, click ⋯, then Cancel event….
-
Optional: type a Reason (up to 500 characters).
-
Click Cancel event.
Every member who is going gets an email and a notification that the event is cancelled, with your reason. The event stays on your Events page under Cancelled.
To bring it back, click ⋯ and Restore event. Members who were going stay on the list, but they are not told. Post in the feed to let them know.
Move an event to a new time
- Open the event and click Edit.
- Change Starts and Ends.
- Click Save changes. If members are going, Studio asks "Move the event to a new time?": click Save new time. You see "New time saved. Remember to tell the members who are going."
Members who are going are not told about the new time. Post an update in the community feed.
Rules and limits
| Item | Rule |
|---|---|
| Event title | 3 to 60 characters |
| Description | Empty, or 10 to 750 characters |
| Join link | Up to 255 characters, starts with https:// |
| Address | Up to 100 characters |
| Unpublish | Not possible while members are going. Cancel the event instead. |
| Delete | Drafts only. Cancel a published event instead. |
If something goes wrong
| Message | What to do |
|---|---|
| "The start is in the past. Choose a later time." | Pick a future start. |
| "The end must be after the start." | Move the end later. |
| "Add the join link. It starts with https://" | Paste the full meeting link. |
| "Enter the address." | Type where the event takes place. |
| "Map search isn't set up for this community yet." | Leave Map pin empty. Members see the address only. |