Write the welcome screen and community guidelines new members see, and choose whether they must add a picture and a bio.
Any Community Admin can do this. The welcome heading, welcome text and guidelines are 3 of the 6 checks you need to go live.
Steps
- In Studio, go to Settings → Onboarding.
- Under Welcome screen, fill in Welcome heading and Welcome text.
- Under Community guidelines, write your rules in the editor.
- Under Profile, set Profile picture and Bio to Required or Optional.
- Click Save changes. You see "Changes saved successfully."
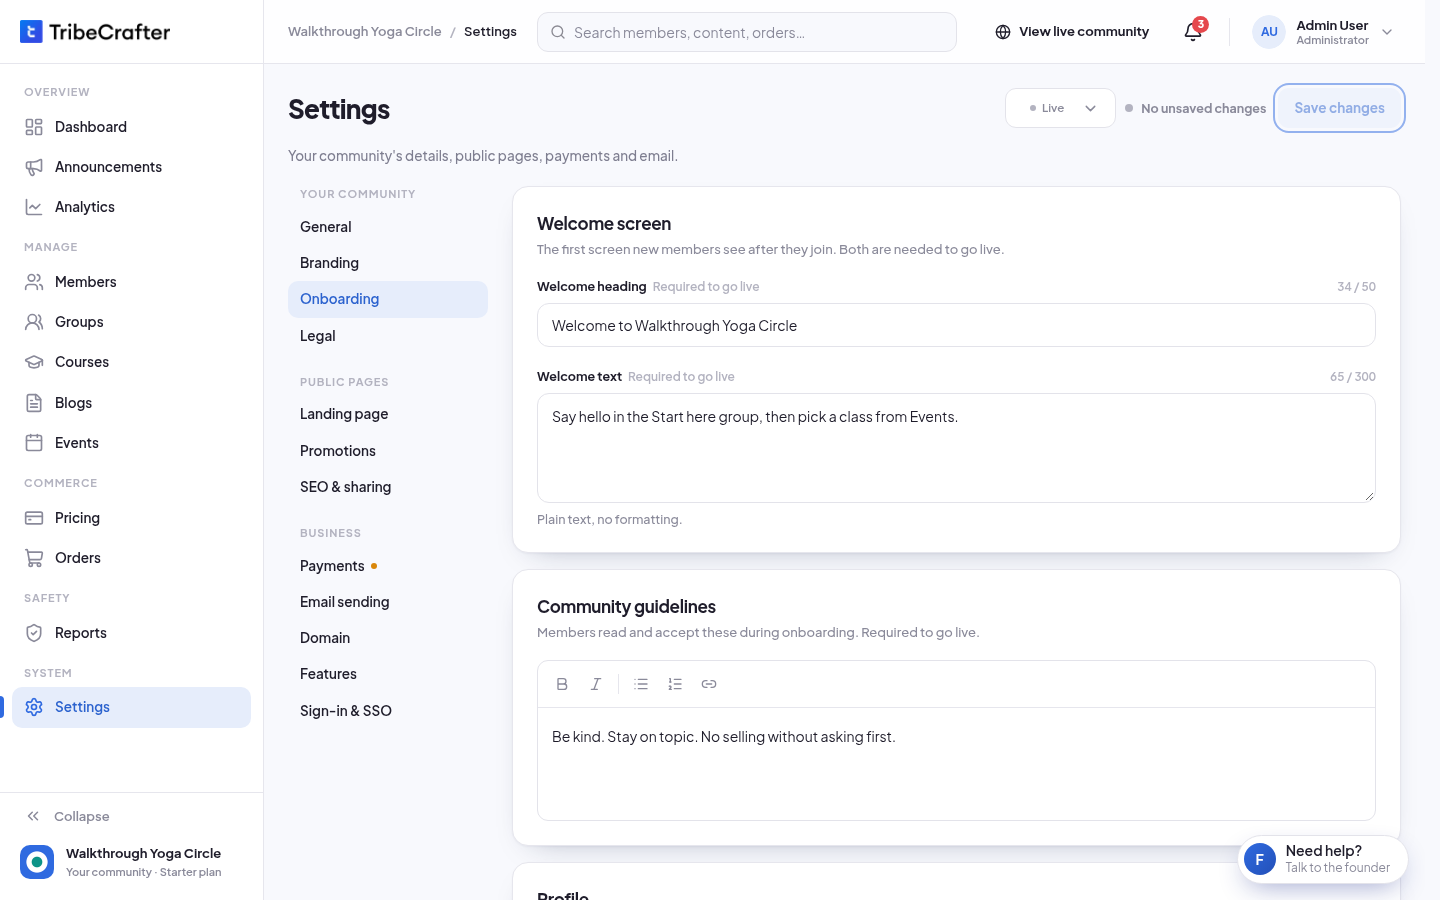
What each part does
| Part | What members see | Limit |
|---|---|---|
| Welcome heading | The title of the first screen after they join. | Up to 50 characters |
| Welcome text | A short message under the heading. Plain text, no formatting. | Up to 300 characters |
| Community guidelines | Rules they read and accept during onboarding. You can use bold, italics, lists and links. | Up to 5000 characters. Formatting counts toward the limit. |
| Profile picture | Required: members must add one before they can start. Optional: members without a picture show their initials. | |
| Bio | Required: members must write one before they can start. They can clear it later in Edit profile. Optional: they can skip it. |
Profile picture and Bio are Required until you change them.
You can save empty texts. An empty heading, welcome text or guidelines only stops your community from going live.