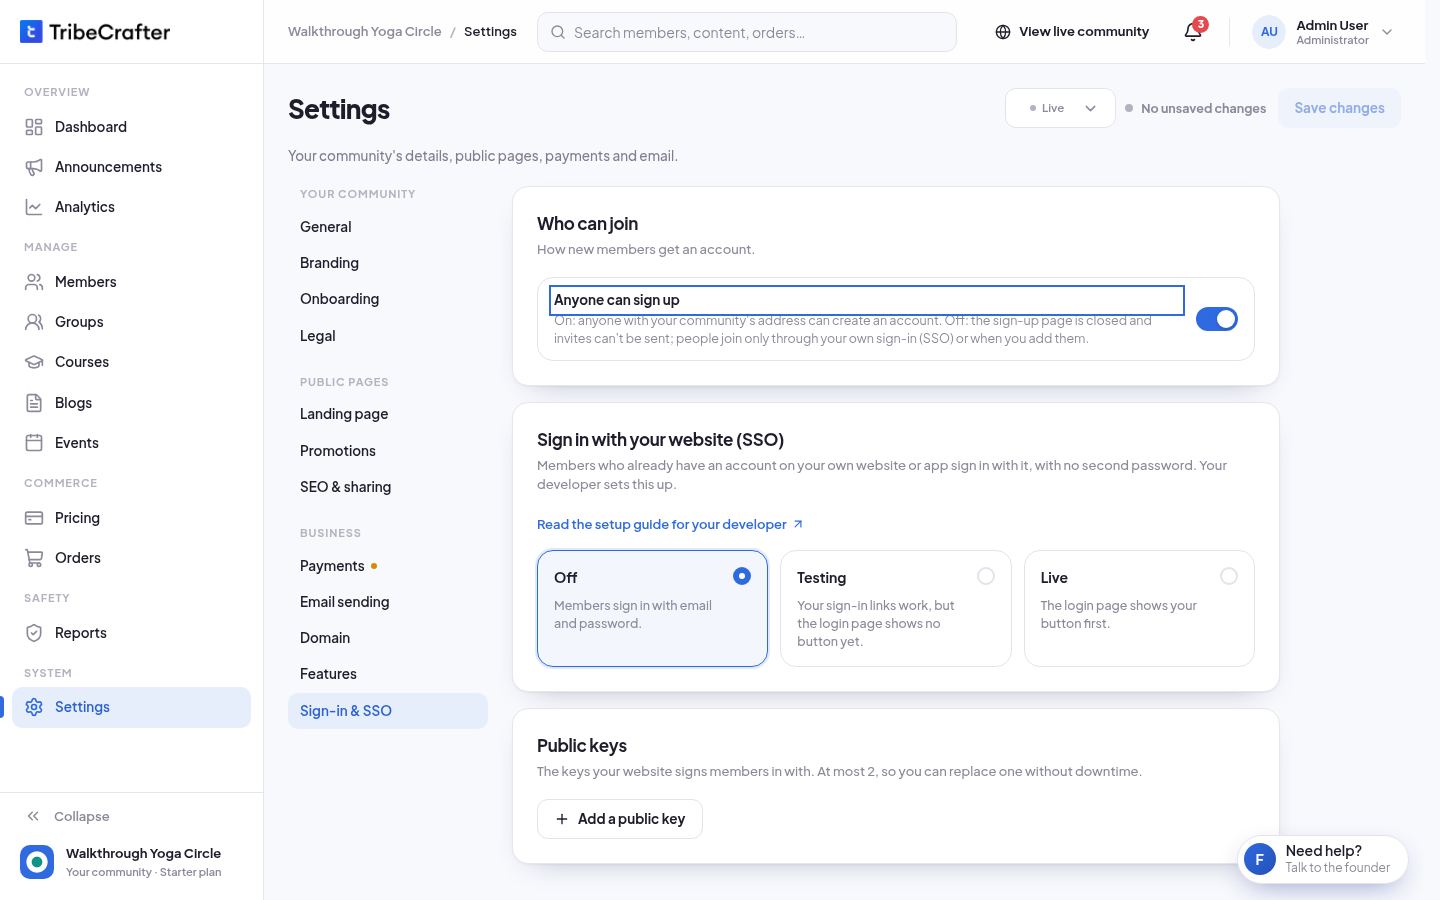
Choose who can sign up, and let members sign in with their account on your own website or app.
Only the owner can change these settings. Other admins see "Only the community owner can change sign-in settings." and the fields are off. If you see "Sign-in settings are not available on this community yet. Use Help to contact us.", ask TribeCrafter through Need help?.
Who can sign up
- In Studio, go to Settings → Sign-in & SSO.
- Under Who can join, set Anyone can sign up:
- On: anyone with your community's address can create an account.
- Off: the sign-up page is closed and you can't send invites. People join only through your own sign-in (SSO) or when you add them.
- Click Save changes.
Sign in with your website (SSO)
With SSO, members who already have an account on your website or app sign in with it. They don't need a second password. Your developer sets this up. Send them the setup guide: the link Read the setup guide for your developer is on this page.
Your developer gives you what to fill in. Then, under SSO, pick one:
| Option | What happens |
|---|---|
| Off | Members sign in with email and password. |
| Testing | Your sign-in links work, but the login page shows no button yet. Use this while your developer tests. |
| Live | The login page shows your button first. |
Testing and Live need at least one public key under Public keys. Live also needs Button label (up to 40 characters, for example "Continue with Acme") and Your login page (an https:// address).
Never paste a private key. Studio refuses it.
If something goes wrong
| Message | What to do |
|---|---|
| "Add a public key before you turn SSO on." | Ask your developer for the public key and add it under Public keys. |
| "Live SSO needs your login page address." | Fill in Your login page. |
| "Live SSO needs a button label." | Fill in Button label. |
| "Use an https:// address." | Addresses must start with https://. |
| "Paste the public key (it starts with -----BEGIN PUBLIC KEY-----)." | Paste the whole public key, including its first and last lines. |