Write a blog post in the editor, choose who can read it, and publish it to your blog.
Before you start
- Community Admins and Blog Managers can write posts.
- A premium post is sold in a collection, through a plan or product. To publish one, a published plan or product must sell one of its collections. See Blog collections.
- There is no scheduled publishing. A post goes live when you click Publish post.
Steps
1. Basics
- In Studio, go to Blogs and click Write a post.
- Fill in Title (up to 255 characters).
- Optional: fill in Summary (up to 500). It shows under the title. Readers without access see it as the preview. If you leave it empty, the first lines of the post are used.
- Under Cover image, click Click to upload a cover image. A cover is needed to publish, not to save a draft.
- Optional: fill in Cover alt text for people who can't see the image.
- Optional: under Categories, pick one or more, or type a new one and press Enter. Members filter the blog by category.
- Check Author. It is you by default. You can pick anyone on your team who is an admin or a Blog Manager.
- Click Next: Write.
2. Write
-
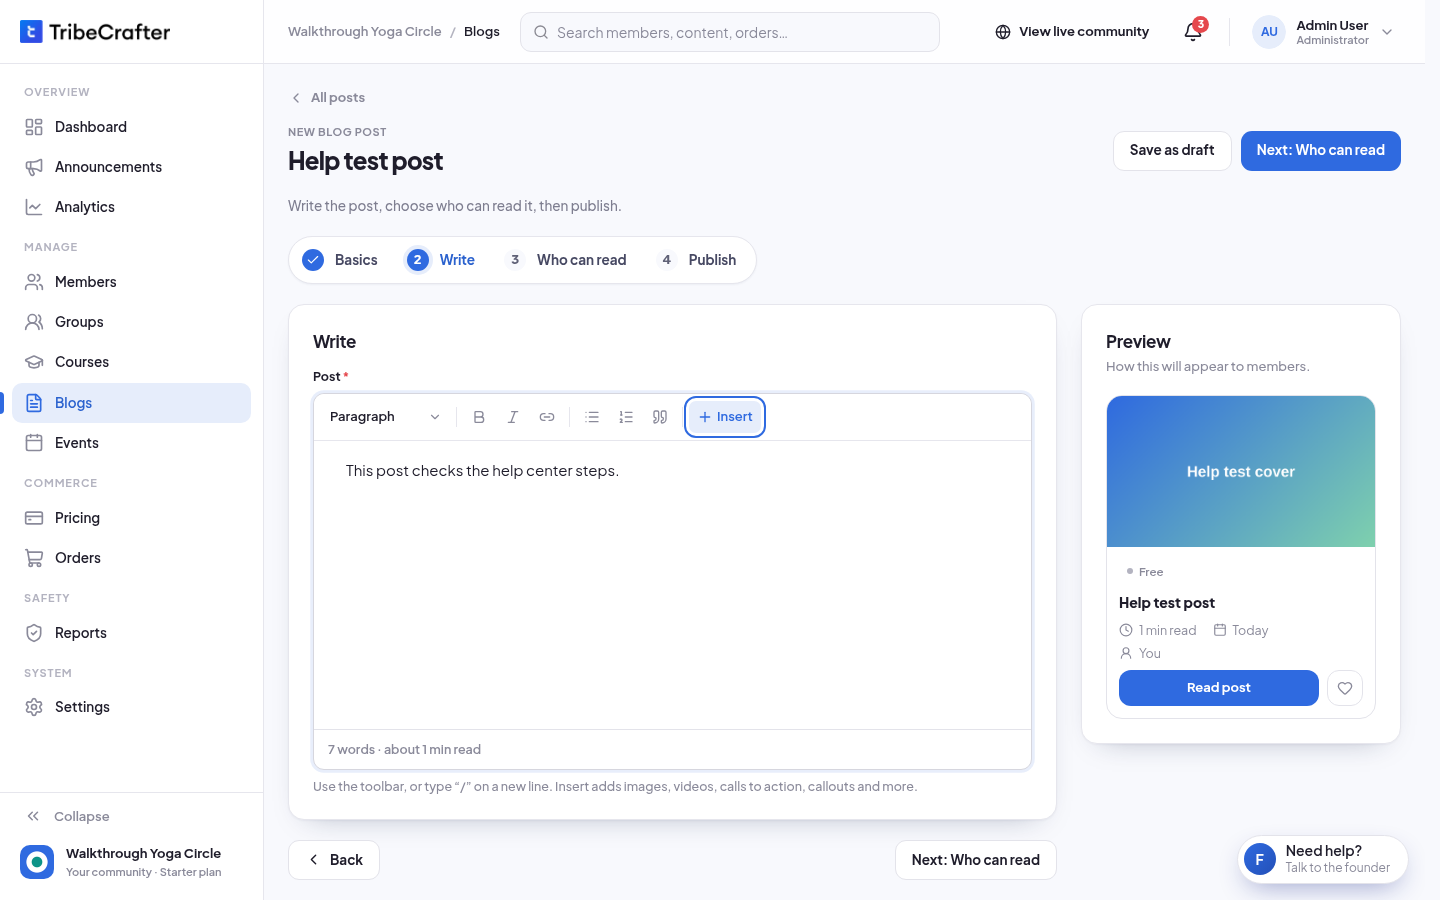
Type your post in Post.
-
Use the toolbar for text style (Paragraph or Heading 2 to 4), Bold, Italic, Link, lists and quotes.
-
Click Insert to add an Image, Gallery, Video (from YouTube or Vimeo), Call to action, Callout, Divider or Table of contents. You can also type "/" on a new line.
-
Click Next: Who can read.
Under the editor you see the word count and the read time. The post title is the only heading 1, so start your headings at Heading 2.
3. Who can read it
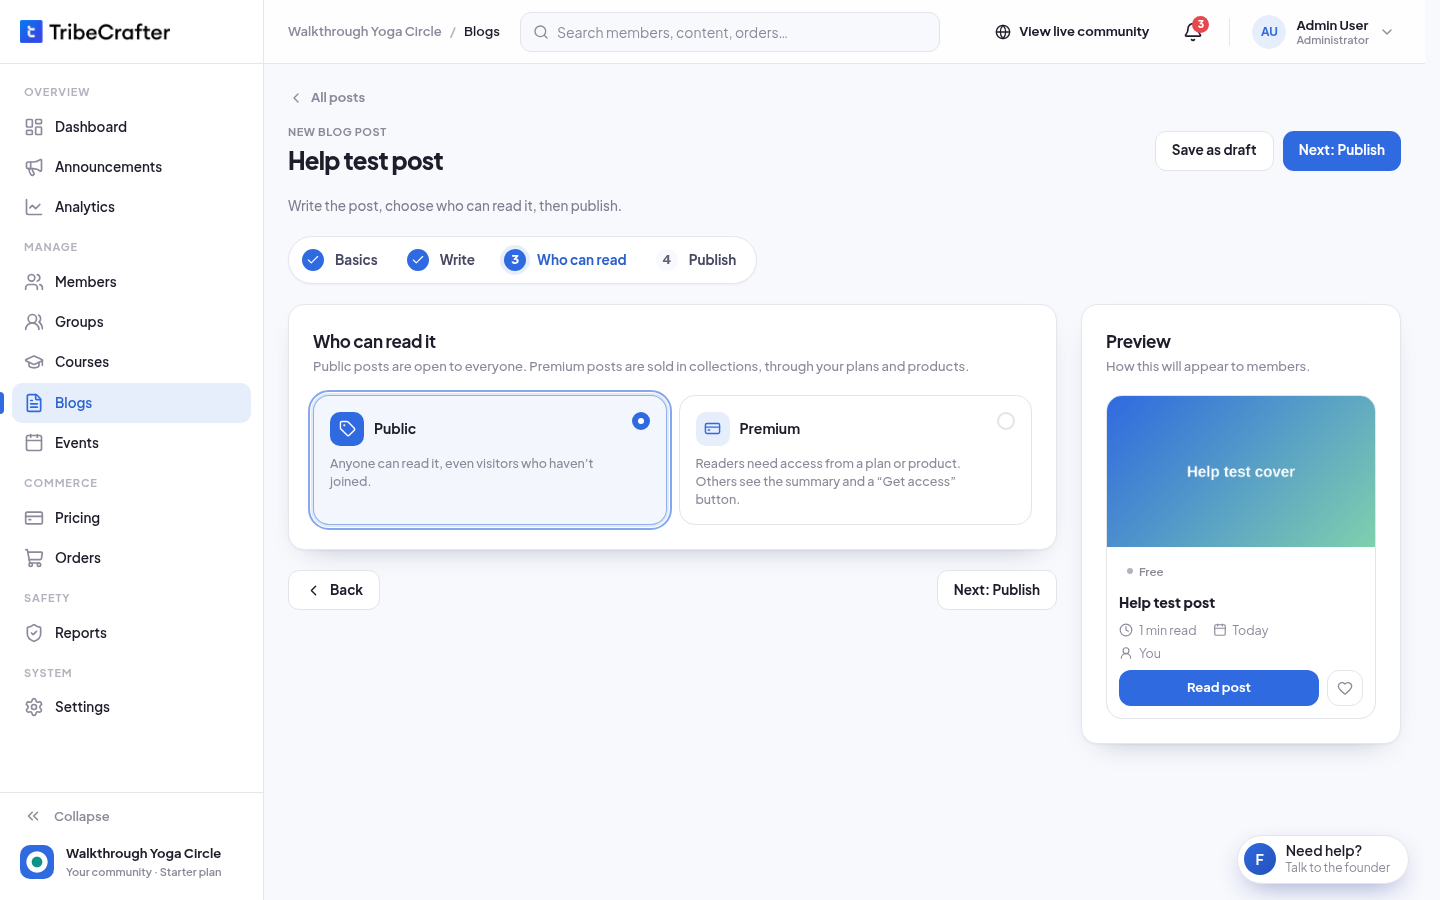
Pick one:
| Option | Who can read the full post |
|---|---|
| Public | "Anyone can read it, even visitors who haven't joined." |
| Premium | "Readers need access from a plan or product. Others see the summary and a "Get access" button." |
For Premium, pick at least one collection in Add to collections, or click New collection to make one. Plans and products sell collections, not single posts.
4. Publish
- Click Next: Publish.
- Turn Recommended on to show a "Recommended" badge and put the post first on the blog.
- Show in Google search is on by default. Optional: fill in Title on Google (up to 70 characters).
- Check the summary under Before you publish, then click Publish post. A message says the post "is published. A post about it goes to the feed."
To finish later, click Save as draft. You see "Draft saved. Members can't see it yet."
The feed post goes out only on the first publish. Saving changes later doesn't post again.
Change a post later
- Go to Blogs and open the post.
- Click Edit. Make your changes and click Save changes. You see "Changes saved."
Use the status menu next to Save changes to unpublish or archive the post. Members can't read it any more, and it leaves search. You can publish it again later.
If someone else saved the post after you opened it, your save is refused. Reload and make your change again.
If you are a Blog Manager
- You can write and edit posts and create categories.
- You can't add a post to a collection, take it out of one, or create a collection. Ask a Community Admin. Studio shows the collection picker, but your changes to it are not saved.
- You can't make a post that is in a collection public. Ask a Community Admin to take it out of its collections first.
If something goes wrong
| Message | What to do |
|---|---|
| "Add a title." | Type a title. A draft needs one too. |
| "Add a cover image. It shows on the blog card and at the top of the post." | Upload a cover before you publish. |
| "Write the post before you publish it." | Add some text to Post. |
| "A premium post needs a collection that a plan or product sells before you publish it. Add one in Who can read, or save it as a draft." | Add the collection to a plan or product, or save a draft. |
| "An image has no alt text: describe it." | Click the image block and describe the picture. |
| "A video has no link." | Paste a YouTube or Vimeo link in the video block, or delete it. |
| "Another post has this web address. Choose another one." | Change the web address under Advanced on the Basics step. |